Understanding Arrow Spine and Proper Shaft Length
Choosing the right arrow starts with understanding static spine, which measures how much a shaft flexes when supported at two points under a two-pound weight. Every bow transfers massive kinetic energy into the shaft at release, causing the arrow to oscillate horizontally and vertically. If an arrow is too flexible for your bow's draw weight, it will kick violently off the arrow rest, fly erratically, and potentially splinter upon launch. Conversely, an overly stiff arrow resists natural oscillation, making clean broadhead or field point flight difficult to stabilize across varied distances.
Shaft length directly impacts effective dynamic spine, meaning the way the arrow behaves in actual flight. A shaft cut down to create 28 inch arrows will shoot noticeably stiffer than an uncut 31-inch shaft of the identical spine rating, even when fired from the same compound or recurve bow. Archers taking introductory archery lessons often learn that draw length dictates minimum shaft clearance, typically requiring the shaft to extend at least an inch past the front edge of the arrow rest at full draw to ensure broadheads or target points clear the riser safely.
Spine charts provided by arrow manufacturers serve as reliable baselines, but they assume standard point weights around 100 grains. Adding heavier brass inserts or heavier points softens the dynamic spine significantly, requiring you to step up to a stiffer category. If your compound bow is set to 65 pounds and your draw length produces a 29-inch cut shaft, a 340 spine is typically a common starting point, whereas a lighter 50-pound setup might require a 400 or 500 spine. Always calculate total tip weight before ordering raw dozen packs.
Carbon Shaft Construction and Material Profiles
Modern arrow shafts predominantly utilize layered carbon fiber weaves, delivering unmatched consistency, durability, and straightness recovery compared to traditional aluminum. High-modulus carbon fibers resist permanent bending; when a carbon shaft survives hard impact against a target frame, it either remains perfectly straight or suffers structural cracks that require discarding. Different manufacturers employ proprietary wrapping techniques to control wall thickness and torsional rigidity, yielding shafts tailored for long-range target precision, heavy big-game penetration, or light 3D tournament speed.
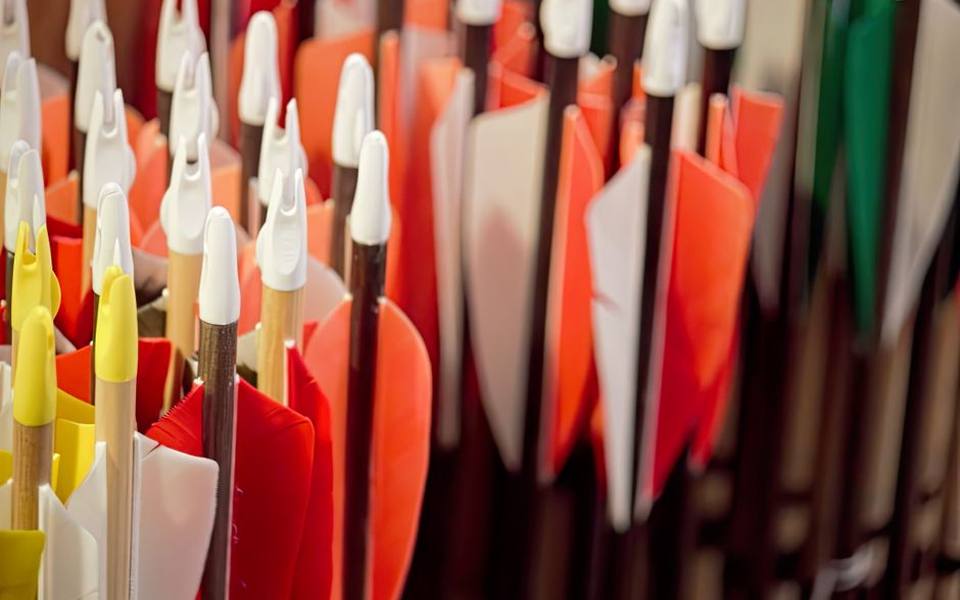
Traditional archers who favor the classic aesthetic of cedar shafts often gravitate toward vintage-style carbon options such as Easton Carbon Legacy shafts, which combine a realistic photorealistic wood-grain finish with modern carbon concentricity. These shafts provide the timeless look demanded by longbow and traditional recurve shooters while accepting standard modern push-in nocks and threaded inserts. They also provide enough mass weight per inch to absorb energy efficiently from heavy wood-handled bows without sending excess hand shock back into the shooter's grip.
For modern compound archers, high-performance hunting options like Carbon Express arrows incorporate specialized dual-spine or tri-spine weight-forward technologies designed to recover from oscillation faster out of the bow. These engineered carbon tubes feature different flex zones along the shaft, stiffening the rear section to keep the arrow tracking true while allowing the front section to absorb launch energy smoothly. Selecting the right carbon construction depends on whether your priority is maximum kinetic energy, flatter trajectory at distance, or traditional range compliance.
Calculating Total Arrow Weight and Front of Center
Finished arrow weight is measured in grains, a unit of mass where 7,000 grains equals one pound. Total weight combines the bare carbon shaft, insert, point, nock, bushing, wrap, and individual fletchings. For general all-around shooting, building 400 grain arrows offers an ideal compromise between velocity and kinetic punch, making it a very popular target weight for compound bows drawn between 55 and 65 pounds. At roughly 400 grains, an arrow maintains a flat trajectory out to typical practice distances without causing excess bow vibration.
Front of Center, commonly abbreviated as FOC, describes the percentage of the arrow's total weight located in the front half of the shaft. To find your arrow's balance point, find where the fully assembled arrow balances on a straight edge, measure from that point to the midpoint of the total shaft length, and divide by the total length. Standard field setups typically fall between 9 and 14 percent FOC, which ensures the front of the shaft leads cleanly through crosswinds without causing the tail to drag or nosedive prematurely.
Traditional longbow shooters and backcountry hunters frequently adjust FOC higher by inserting heavy brass components weighing 50 to 75 grains instead of standard 12-grain aluminum inserts. While this increases total penetration on dense foam targets, it drastically softens dynamic arrow flex. If you plan to build arrows with elevated front-end weight, you must plan ahead by selecting bare shafts that are one spine deflection stiffer than the standard spine chart recommendation to maintain predictable flight.
Sizing Shafts Cleanly with an Arrow Cutting Saw
Cutting carbon shafts at home requires a purpose-built high-speed arrow cutting saw spinning an abrasive cutoff wheel between 5,000 and 8,000 revolutions per minute. Never attempt to cut carbon tubes using pipe cutters, hacksaws, or rotary hand tools. Standard toothed blades snag the high-tensile carbon fibers, causing microscopic structural delamination and splintering along the inner wall. A specialized saw holds the shaft on a rigid rail with a secure stop bracket, ensuring that every shaft in your batch is cut to the exact millimeter.
When measuring where to cut, remember that arrow length is officially defined by the Archery Trade Association as the distance from the bottom of the nock groove to the end of the bare carbon, excluding the point or insert. If you are trimming an existing arrow setup or replicating a favorite loaner arrow, measure twice before locking down the saw's carriage stop. Many experienced builders cut equal amounts from both the nock end and the point end of raw shafts, which removes slight manufacturing runout and centers the straightest portion of the carbon tube.
After cutting, always square the ends of the shaft using an arrow squaring tool. Even high-grade cutoff saws can leave a microscopic bevel on the cut carbon face. If the face of the tube is not perpendicular to the shaft's central axis, the insert will seat at an imperceptible angle, causing whatever tip you screw in to wobble when spun. If you do not own a cut-off tool, a local archery pro shop can trim raw shafts to your exact length in minutes, saving you initial tool costs.
Vanes Versus Feathers for Arrow Fletching
Fletching stabilizes an arrow by creating aerodynamic drag at the rear of the shaft, pulling the tail into alignment behind the point immediately after release. The two primary categories of fletching material are synthetic plastic vanes and natural turkey feather vanes. Plastic vanes dominate modern archery due to their extreme durability, resistance to rain, and consistency across varying temperatures. They can withstand passing through tall grass, brush, and repeated impacts into dense target butts without tearing or losing their molded aerodynamic contour.
Modern synthetic formulations, including popular stiff urethane options like AAE fletching materials, feature textured surfaces and engineered ridges designed to channel air over the vane with minimal turbulence. These specialized vanes maintain their structural rigidity at high speeds, preventing flutter and hiss during flight. However, because plastic vanes do not compress against hard surfaces, they require an elevated arrow rest or a drop-away rest. Firing plastic vanes off an arrow shelf on a traditional recurve causes severe tail-kick as the rigid vane deflects off the wood riser.
Natural feathers remain the gold standard for traditional shooters and indoor spot shooters. Feathers are exceptionally light, which reduces total tail weight, naturally boosts front-of-center balance, and allows arrows to stabilize within the first ten yards of flight. Furthermore, when a feather strikes an arrow shelf, it collapses flat against the carbon shaft and bounces back instantly without redirecting the arrow's trajectory. The main drawback is vulnerability to moisture; wet feathers mat down quickly, losing their steering surface unless treated with waterproofing powder.
Selecting Straight, Offset, and Helical Configurations
Beyond the material itself, the angle at which you glue fletchings to the shaft governs how fast the arrow rotates in flight. Straight fletching positions the vane parallel to the shaft's center line. While straight fletchings generate minimal drag and offer the fastest downrange arrow speeds, they impart very little spin. Straight fletching works fine for slender target shafts tipped with small bullet points, but it struggles to steer broadheads or large-diameter practice tips accurately over longer yardages.
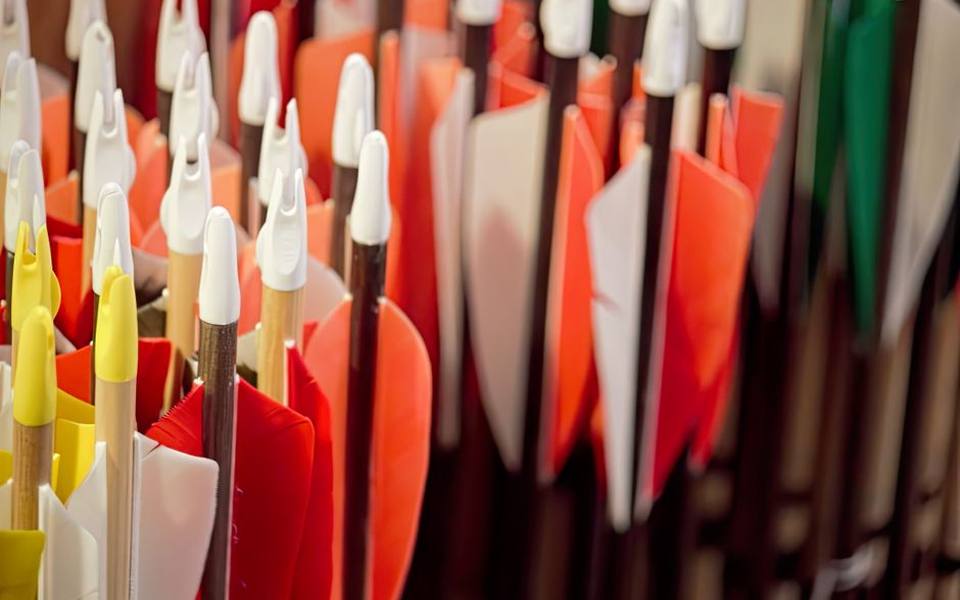
Offset fletching angles the entire straight clamp one to three degrees away from the shaft's centerline. This moderate angle forces passing air to push against the vane's face, spinning the arrow like a thrown football. Offset mounting represents an excellent middle ground for target archers and recreational shooters, providing noticeable arrow stabilization without requiring excessive clearance inside the bow sight window. Most standard fletching jigs allow shooters to dial in precise offset degrees simply by adjusting thumb screws on the mounting base.
A fletching helical setup uses a curved clamp to wrap the vane around the shaft in a gentle spiral. Helical fletching produces maximum rotational torque and unmatched stabilization, making it the preferred configuration for archers shooting large fixed-blade broadheads on an outdoor 3D course. The aggressive corkscrew spin forces the arrow to overcome frontal steering forces created by broadhead blades. However, strong helical drag slows the arrow down faster downrange and can cause clearance issues with narrow containment rests or tight cable guards.
Three-Fletch Versus Four-Fletch Arrow Designs
Traditional arrows have utilized three fletchings spaced at 120-degree intervals for centuries, matching the geometry of classic three-point arrow rests and providing predictable cock-feather orientation. In a three-fletch system, one vane typically points straight up or directly away from the riser, ensuring that the remaining two vanes pass cleanly above and below arrow rest prongs. For millions of compound and recurve shooters, a standard three-vane configuration delivers dependable accuracy, modest weight, and simple alignment during assembly.
Recently, four fletching arrows have surged in popularity among target shooters and bowhunters looking to maximize steering surface while reducing profile height. A four-fletch arrangement arranges vanes at 90-degree angles (or sometimes 105-by-75 degree X-configurations). By adding a fourth vane, you can use shorter, lower-profile vanes that yield the same or greater surface steering area as three taller vanes. The lower profile dramatically reduces the likelihood of the vanes clipping the bow riser, cables, or rest housing on fast modern bows.
Building a four-fletch arrow does involve trade-offs that every arrow builder should weigh before committing a full dozen shafts. Adding a fourth vane introduces additional tail weight—typically between five and ten grains depending on the vane and glue volume—which slightly reduces overall FOC balance. It also takes roughly twenty-five percent longer to assemble a batch of arrows on a single-clamp jig. Still, for windy outdoor conditions or stabilizing stubborn hunting points, four-fletch builds offer exceptionally tight arrow groups.
Flu-Flu Fletching for Aerial Targets and Safety
Standard arrows are engineered to fly as far and flat as possible, but certain shooting disciplines require the exact opposite behavior. When shooting at elevated targets, climbing squirrels, or flying clay discs thrown across a range, a missed standard arrow can travel hundreds of yards into the distance, posing a significant safety hazard and becoming nearly impossible to recover. Specialized flu flu fletching solves this problem by using oversized, untrimmed feathers to intentionally brake the shaft after a short flight.
A flu-flu arrow flies out of the bow at normal launch speed for the first fifteen to twenty yards, allowing you to hit moving aerial targets cleanly. Once the arrow passes twenty or twenty-five yards, the massive surface area of the untrimmed feathers creates overwhelming aerodynamic drag, causing the shaft to rapidly decelerate, stall out, and flutter softly down to the ground. This allows archers to practice aerial wingshooting in open fields without losing dozens of expensive carbon shafts in the surrounding brush.
There are two primary ways to fletch a flu-flu: the six-feather style and the spiral-wrap style. The six-feather method uses full-height, uncut turkey feathers glued in straight lines around the shaft circumference. The spiral-wrap method takes one or two full-length primary flight feathers and wraps them spirally down several inches of the shaft, creating a brush-like bottle-washer appearance. Spiral wraps create the most dramatic braking action, dropping arrows predictably within thirty to forty yards from the shooting line.
Component Assembly: Inserts, Outserts, and Field Points
Once shafts are cut and squared, the next step is installing point inserts to accept threaded tips. Standard internal inserts slide completely inside standard-diameter shafts, while micro-diameter shafts often require half-out inserts or exterior collars to bridge the step between small carbon tubes and standard point threads. Clean the inside of the shaft with an isopropyl alcohol swab and a cotton swab before gluing; carbon dust and manufacturing mold releases will prevent adhesives from bonding securely to the inner wall.
Two-part flexible epoxies or specialized impact-resistant cyanoacrylate adhesives work best for carbon inserts. Avoid brittle hardware-store superglues, which crack under the rapid deceleration shock of striking target backstops. When seating the insert, rotate it slightly as you push it into the tube to spread adhesive evenly around the circumference, then wipe away any excess glue with a paper towel. Allow arrows to rest horizontally until the adhesive cures completely to avoid insert drift.
Selecting practice archery field points requires matching both diameter and weight to your planned setup. Standard practice tips are manufactured in 5/16-inch, 9/32-inch, and 17/64-inch diameters; selecting a point that matches your shaft's outer collar prevents arrows from snagging on dense target foam during arrow pulling. Standard point weights range from 85 to 150 grains. Maintaining identical grain weights between your practice points and your broadheads ensures your sight pins remain zeroed when transitioning between range practice and competitive shoots.
Executing a Clean DIY Fletching Workflow
Fletching your own shafts at home requires a dependable fletching jig, which holds the carbon shaft in an indexed receiver while a magnetic metal clamp secures the vane against the tube. Begin by prepping the carbon surface. While some archers apply decorative adhesive wraps to increase vane adhesion and field visibility, bare carbon builds require thorough degreasing with pure isopropyl alcohol or an abrasive cleaning scrub. Never touch the cleaned fletching zone with bare fingers, as natural skin oils ruin adhesive bonds.
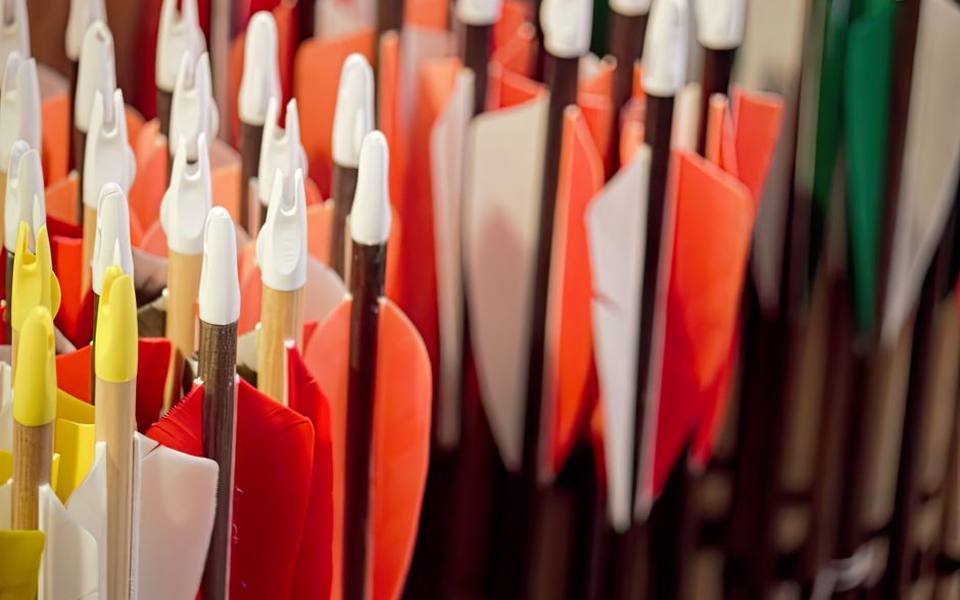
Place your vane into the clamp, leaving roughly one-sixteenth of an inch of the base exposed along the clamp edge. Run a thin, continuous bead of specialized fletching adhesive along the base channel. Less is more: applying too much glue creates messy beads that squeeze out onto the shaft, adding unwanted tail weight and extending cure times. Firmly press the clamp into the jig's magnetic receiver, seating the vane firmly against the shaft with even downward pressure across its entire length.
Hold pressure for the recommended clamp time, which typically ranges from fifteen seconds to three minutes depending on whether you use fast-acting cyanoacrylates or slower solvent-based glues. Once released, index the jig dial to the next slot and repeat the process for all remaining vanes. After the entire arrow is fletched, place a microscopic dab of adhesive on the front tip and rear heel of each vane base. These tiny tip dabs prevent the leading edge from peeling when arrows penetrate deeply into dense targets.
Range Testing, Paper Tuning, and Troubleshooting
Building custom arrows allows you to diagnose and eliminate flight flaws through controlled paper tuning. When you shoot an arrow through a taut sheet of paper placed four to six feet in front of your bow, the tear left in the paper reveals dynamic flight characteristics. A high tear indicates a low nocking point or stiff arrow rest, while a horizontal left or right tear indicates improper arrow spine or vane clearance contact. Paper tuning provides immediate confirmation that your calculated arrow spine matches your bow setup.
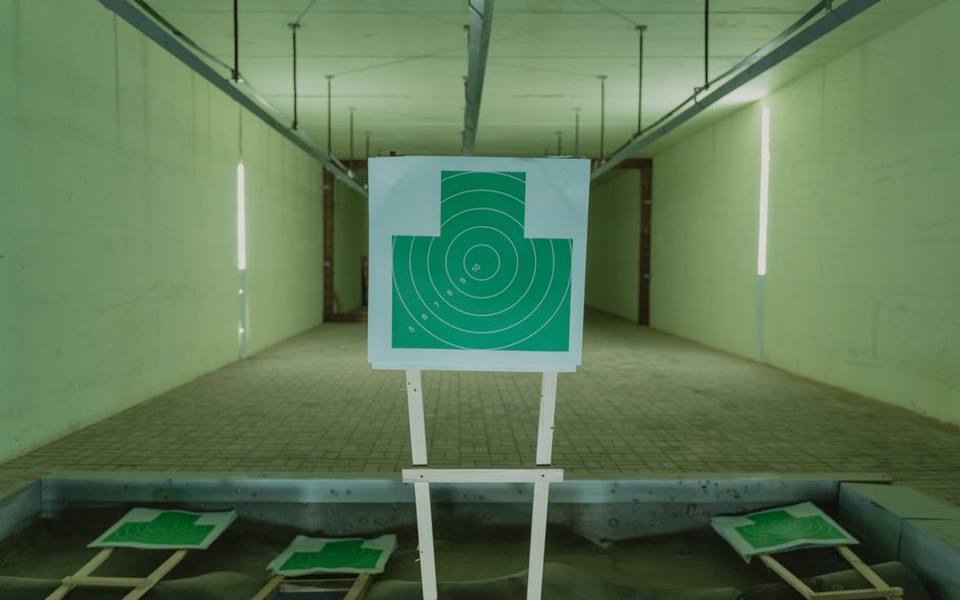
After paper tuning, head to an indoor archery range to confirm group consistency at measured twenty-yard lines where wind and rain cannot mask equipment flaws. Shoot three-arrow groups, numbering each shaft on the vane with a permanent marker. If one specific arrow consistently groups two inches outside the main cluster, inspect that shaft for nock alignment or spine variance. Turning the nock ninety degrees on the shaft often brings an errant flyer right back into the center of the bullseye.
Across the country, archers use regional directory listings to locate quality facilities, with over 1,040 listings in top states making it simple to find specialized ranges. For instance, archers testing setups across extensive ranges in Pennsylvania or ranges across Wisconsin can easily transition from indoor lane tuning to challenging outdoor courses. Building your own arrows gives you total control over every component, delivering tighter groups, improved confidence, and a deep appreciation for the science of arrow flight.
Published 2026-09-21 · reviewed with each rebuild, last October 2026.
Find archery ranges & sports shops near you
The directory lists 38,975 archery ranges & sports shops by state and city — pick your state or use the “Near me” button in the header.
More guides
-
 Money
MoneyA Guide to Archery Range Fees and Lesson Costs
-
 Buying
Choosing Broadheads and Aiming for the Perfect Shot
-
 Service
DIY Bow Maintenance, Tuning, and Basic Repairs
-
 Buying
Choosing Sights and Rangefinders for Better Accuracy
-
 Buying
Essential Gear for Target Practice and Bowhunting Preparation
-
 Money
MoneyUnderstanding Bow Purchase and Restringing Costs: A Complete Pricing Guide
-
 Owning
Arrow Selection, Cutting, and Fletching at Home: A Complete Guide
-
 Safety
Bowhunting Shot Placement Guide for Deer and Turkey
-
 Buying
Complete Guide to Choosing the Best Crossbow Broadheads
-
 Money
MoneyHow Much Does Archery Cost? A Realistic Beginner Budget
-
 Buying
Choosing the Right Arrows and Field Points: Shaft Materials, Weights, and Tuning
-
 Buying
Best Archery Sets for Beginners: Complete Buyer Guide and Starter Tips
-
 Owning
Best Archery Targets and Backstops: 3D, Foam, Bag, and DIY Setup Guide
-
 Buying
Beginner Archery Buying Guide: Recurve, Compound, and Traditional Bows
-
 Buying
Bowfishing Equipment Guide: Bows, Reels, Arrows, and Rigging Setups
-
 Owning
Lighted Nocks and DIY Arrow Building: Fletching, Cutting, and Tuning
-
 Buying
Crossbow Bolts, Broadheads, and Cocking Devices: Complete Buyer's Guide
-
 Buying
Complete Arrow Selection Guide: Carbon Shafts, Spine, Length, and Brands
-
 Safety
Archery Protective Gear: Arm Guards, Chest Protectors, Tabs, and Slings
-
 Buying
Archery Quivers Buying Guide: Hip, Back, and Bow-Mounted Options
-
 Buying
Bow Release Aids Explained: Wrist Strap, Thumb Button, and Hinge Releases
-
 Owning
Compound Bow Tuning and Care: Strings, Wax, Stabilizers, and Cases
-
 Buying
Arrow Rests Compared: Whisker Biscuit, Cable-Driven, and Limb-Driven
-
 Safety
Archery Lessons, Proper Form, Range Etiquette, and Youth Programs
-
 Owning
Complete Guide to Single Pin Bow Sights and Sight Tapes
-
 Owning
Finding Archery Ranges, Pro Shops, Clubs, and Instructor Programs
-
 Buying
Best Hunting Broadheads: Fixed Blade vs Mechanical Broadheads
-
 Buying
Archery Targets Guide: 3D Targets, Bags, Blocks, and DIY Backstops
-
 Buying
Archery Quivers Guide: Bow-Mounted, Hip, Back, and Crossbow Quivers
-
 Service
Bow Tuning and Setup: Paper Tuning, Arrow Rests, and Bow Maintenance
-
 Buying
Bowfishing Gear Guide: Bows, Rigs, Arrows, and Setup Options
-
 Owning
Essential Archery Accessories: Lighted Nocks, Arrow Pullers, and Arm Guards
-
 Buying
Archery Release Aids Guide: Thumb, Hinge, Wrist, and Mechanical Releases
-
 Buying
Essential Bowhunting Gear, Deer Supplies, and Gift Guide
-
 Buying
Crossbow Buying Guide: Matching Platforms, Bolts, Optics, and Fletching
-
 Buying
Beginner Bow & Arrow Starter Kits: How to Choose Your First Setup
-
 Owning
Traditional Archery, Longbows, and Primitive Gear
-
 Buying
Deer Hunting Bows: Comparing Recurve and Compound Setups, Finding Deals, and Studying Hunting Film
-
 Buying
Compound Bow Setup, Tuning, Form, and Equipment Guide
-
 Owning
Compound Bow Release Aids and Grip Tape: Enhancing Control and Consistency
-
 Service
Crossbow Maintenance: String Replacement and Scope Sighting Guide
-
 Owning
Broken Bow Cabin Rentals: Complete Beavers Bend Vacation Guide
-
 Safety
Broken Bow Lake Rentals: Complete Guide to Boats, ATVs, and Trail Gear