The Two Fundamental Connection Points in Compound Archery
Shooting a modern compound bow accurately comes down to repeatability, and that repeatability relies heavily on the only two places your body touches the bow during the shot sequence: the riser grip and the release aid. While modern cam systems, carbon risers, and high-performance limbs store and deliver immense energy, human interface errors account for nearly all directional misses. Minor inconsistencies at either contact point magnify downrange, turning a tight grouping into an erratic spread across the target face.
Mechanical release aids replace the traditional finger draw, providing a clean, frictionless separation between your hand and the bowstring. Meanwhile, the bow grip governs how the bow settles into your skeletal structure at full draw. If your hand slips, twists, or applies uneven torque to the riser, the bow limbs twist slightly along their vertical axis, sending the arrow off its intended path regardless of how well your sight pins were aligned before the trigger broke.
Upgrading or adjusting these accessories is typically one of the most effective and affordable ways to elevate your archery performance. Before spending substantial money on new dampening systems, micro-adjust sights, or lighter arrow shafts, archers generally see immediate improvements by mastering their interface accessories. Understanding how mechanical releases function and why textured grip tape stabilizes your bow hand provides the foundation for shot-to-shot consistency on any shooting line.
How Mechanical Release Aids Work
A mechanical release aid is an engineered mechanism that grips the bowstring—typically through a braided nylon loop known as a D-loop—using mechanical jaws, a single caliper, or a precision sear. Because modern compound bows feature steep string angles at full draw and let-off percentages that can exceed eighty percent, holding the bowstring with fingers causes string pinch and introduces horizontal deflection as the string rolls off the finger pads during release.
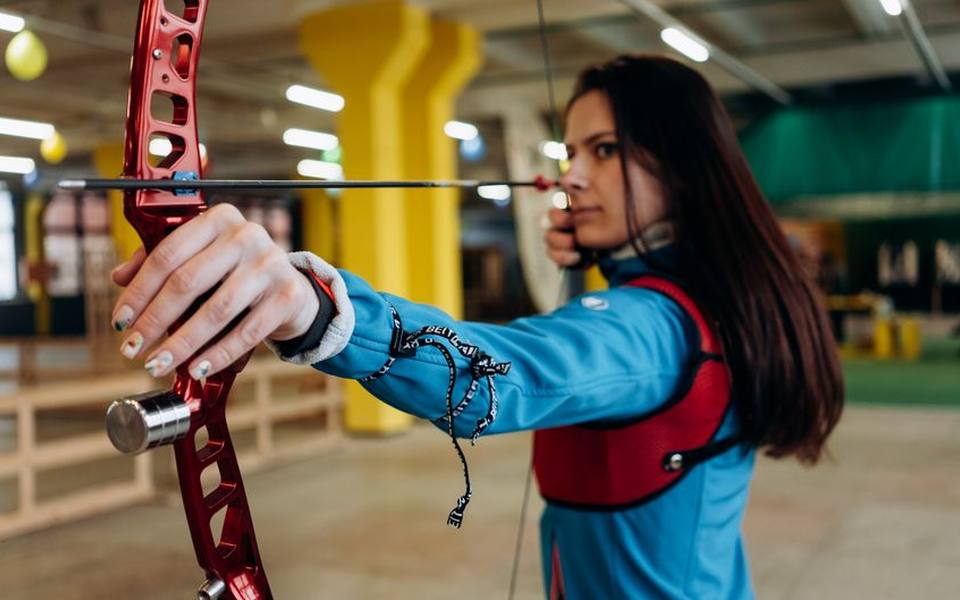
By utilizing a mechanical sear, the release holds the full holding weight of the bow with absolute stability until the shooter activates the firing mechanism. When triggered, the jaw or hook pivots open instantly, letting the string travel forward unobstructed along the centerline of the riser. This mechanical detachment eliminates the lateral torque that human fingers naturally impart, creating an identical launch platform for every single arrow you send downfield.
Internal components of modern releases rely on hardened tool steel sears, precision roller bearings, and adjustable springs. Archers can typically adjust both the travel, which is the physical distance the trigger moves before firing, and the trigger tension, which dictates how much physical pressure is required to break the shot. Finding the proper balance between these internal adjustments allows you to execute a clean, surprise shot without anticipating the noise or the bow jump.
Wrist-Strap Index Trigger Releases
The wrist-strap index trigger release remains the most common mechanical release style in North America, particularly among bowhunters and recreational archers. This design secures a padded strap around the archer's wrist, transferring the holding weight of the bow away from the fingers and into the structural bones of the forearm. A connecting post or nylon webbing extends forward from the strap, placing a single-caliper or dual-caliper head right under the archer's index finger.
One significant advantage of the wrist-strap design is retention. Because the device is strapped directly to your wrist, you cannot accidentally drop it from an elevated treestand or misplace it in thick brush while navigating field terrain. Drawing the bow also feels manageable for beginners, as you can leverage your larger back and arm muscles against the wrist cuff rather than clutching a small metal handle solely with your fingers.
However, index trigger releases carry a high risk of developing shot anticipation or target panic if used incorrectly. Because the trigger rests under the sensitive tip of the index finger, shooters often develop a habit of slapping or punching the trigger the instant their sight pin floats across the bullseye. To combat this tendency, coaches at archery ranges with lessons teach archers to wrap their finger deeply around the trigger peg and pull through using their shoulder blades.
Handheld Thumb Button Releases
Handheld releases feature a solid aluminum or brass handle shaped with finger grooves, usually designed to accommodate three or four fingers. Instead of an index trigger, these releases use a barrel or peg positioned near the thumb. To operate the release, you draw the bow while keeping your thumb completely off the peg, settle solidly into your anchor point, rest your thumb over the barrel, and squeeze your back muscles until the sear trips.
Many competitive archers and experienced hunters prefer handheld thumb buttons because they encourage a firmer, more repeatable anchor position against the jawbone. By resting the space between your index and middle finger knuckles firmly against the underside of your jawline, you create a rock-solid bone-on-bone reference point. This repeatable geometry substantially tightens vertical arrow groupings compared to floating wrist straps, especially past forty yards.
Additionally, handheld releases can be clipped directly onto the bow's D-loop while waiting on a shooting line or in a hunting blind, leaving both hands entirely free. If you are shopping for your first handheld model, stopping by an archery pro shop allows you to test handle geometry in your palm, ensuring the sweep angle and finger spread fit your individual hand anatomy comfortably.
Hinge and Resistance Releases for Pure Execution
Hinge releases, often referred to broadly as back-tension releases, feature no mechanical trigger whatsoever. Instead, the release head rotates around a half-moon sear as the archer increases tension through their rhomboid and latissimus muscles. As you settle into full draw, you transfer pressure from your index finger to your ring and pinky fingers, gently rotating the release handle until the sear slips off the moon edge and fires the shot unexpectedly.
Resistance-activated releases look similar to handheld thumb buttons but operate through spring pressure calibrated to your bow's exact holding weight. With this design, you hold down a safety thumb lever while drawing past peak weight into the let-off valley. Once anchored, you release the safety and simply pull straight back against the back wall; when pulling force exceeds the holding weight by a predetermined number of pounds, the internal sear disengages.
Both hinge and resistance aids serve as the premier training tools for conquering target panic and eliminating flinching. Because you cannot predict the exact millisecond the shot will break, your nervous system remains calm, allowing your sight pin to hover naturally over the target while your subconscious handles aiming. These devices are exceptionally popular among archers practicing at an indoor range, where controlled conditions allow meticulous focus on back-tension fundamentals.
Selecting the Right Release Aid for Your Archery Style
Choosing between an index wrist strap, a thumb button, or a hinge depends entirely on your primary shooting environment and personal tendencies. Bowhunters navigating cold morning conditions often favor index releases because they fit comfortably over heavy winter gloves and remain tethered to the wrist. When shooting from awkward treestand angles or under tight time constraints, having an immediate trigger option provides practical security that precision target releases sometimes lack.

Conversely, archers spending weekends hiking challenging terrain on a 3D course frequently migrate toward heavy brass thumb buttons or hinge releases. The added physical weight of brass dampens hand tremors, while the crisp sear release provides the micro-level forgiveness necessary for hitting tiny foam scoring rings at unmarked distances. Many seasoned archers practice all winter with a hinge to maintain disciplined form, then transition to a thumb button for field season.
Budget also plays a noticeable role in your selection process, as mechanical releases span a wide price spectrum based on materials and tolerances. Entry-level wrist releases typically cost considerably less than precision thumb releases machined from solid bar stock. Regardless of which mechanical release you pick, commit to shooting hundreds of arrows with that specific platform before taking it into competition, as muscle memory demands continuous reinforcement to remain steady under pressure.
The Physics of the Bow Grip and Hand Torque
While your drawing hand controls string release, your bow hand controls the flight trajectory of the arrow through the critical milliseconds before clearance. When you draw a compound bow, you are balancing dozens of pounds of lateral force across a narrow strip of aluminum or composite material. Any rotational torque applied through your palm twists the bow riser, forcing the arrow rest out of alignment with the bow's natural power stroke.
The ideal bow grip relies on the natural anatomy of the hand rather than muscular gripping strength. Your fingers should rest relaxed at an angle roughly forty-five degrees to the riser, with the narrow grip plate resting squarely against the muscular pad of your thumb known as the thenar eminence. Squeezing your fingers around the handle or letting the riser slide toward the center of your palm causes unpredictable left-and-right arrow impacts.
Unfortunately, hands perspire in hot weather and lose tactile sensation in freezing temperatures, causing the bow hand to shift positions between shots. Even a fractional shift in hand position alters how the riser balances against your skeletal structure at full draw. This mechanical instability is precisely why modern archers frequently wrap their compound risers with specialized grip tape designed to maintain consistent skin-to-riser traction.
Archery Grip Tape Materials and Performance Benefits
Archery grip tape is an engineered wrap designed to provide high-friction surface traction without adding unnecessary bulk to the bow handle. Most high-performance wraps utilize polyurethane elastomer compounds, textured silicone coatings, or synthetic microfibers similar to high-end tennis racket overgrips. Unlike standard electrical or duct tape, dedicated bow grip wraps absorb sweat, resist tearing from glove friction, and remain completely tack-free so dirt and field grit do not adhere to your bow.
A primary advantage of applying grip tape to a bare metal riser is thermal insulation. Aluminum and carbon risers conduct ambient temperatures rapidly, turning bare handles into freezing blocks during late autumn or winter shooting sessions. Cold metal stiffens hand muscles and robs you of sensory feedback, leading to involuntary grip tension. A quality wrap provides an effective thermal barrier, keeping the interface comfortable against bare skin without altering factory grip angles.
Furthermore, the subtle dampening properties of textured grip wraps absorb high-frequency hand vibration generated when the limbs release stored energy. The micro-textured surface locks the thenar pad in place instantly as you raise the bow into the draw cycle, ensuring your hand settles into the exact same orientation every repetition. This positive tactile registration prevents the hand from sliding upward toward the arrow shelf when drawing heavy draw-weight bows.
How to Properly Wrap and Maintain Bow Riser Grip Tape
Applying grip tape to your compound bow requires methodical preparation to ensure the wrap remains tight, smooth, and durable over thousands of arrow cycles. Begin by thoroughly cleaning the bare bow grip or side plates using isopropyl alcohol and a clean lint-free cloth. Removing residual skin oils, dirt, and manufacturing mold-release compounds is essential for ensuring the adhesive backing bonds firmly without peeling up at the edges after a few practice sessions.
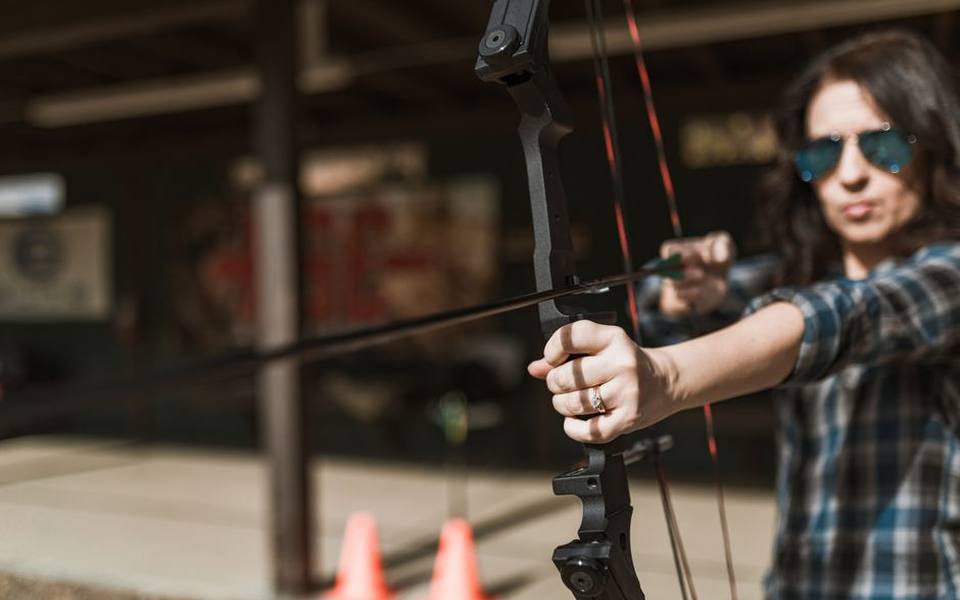
Start wrapping at the base of the riser handle, overlapping the first turn completely to anchor the material. Work your way upward toward the arrow shelf, maintaining firm, consistent tension on the wrap to eliminate air bubbles and excessive material thickness. Overlap each spiral by roughly one-eighth of an inch; excessive overlap creates an uneven, bulky handle that alters your manufacturer's carefully calculated grip angle and introduces unwanted torque.
Once you reach the top of the grip throat just below the shelf, trim the excess wrap at a tapered angle using sharp shears. Secure the upper edge neatly using the thin, moisture-resistant finishing tape typically included with the grip kit. Inspect the finished wrap periodically for fraying or smoothing along high-contact friction zones, as replacing worn grip tape every season ensures your bow hand receives identical tactile feedback year-round.
Harmonizing Release Technique with a Relaxed Grip
A great mechanical release and a textured grip wrap cannot compensate for fundamentally flawed shooting form, but they serve as the perfect catalyst for developing a disciplined shot process. To achieve true consistency, both hands must work in total harmony without fighting each other. While your bow arm acts as a passive, relaxed shock absorber pushing gently toward the target, your release hand must apply steady, continuous rearward traction.
To evaluate whether your grip and release setup are working together effectively, archers often conduct blank-bale shooting drills at close range without an aiming dot. By eliminating the pressure to hit a specific spot on the paper, you can direct your entire conscious focus to the sensory feeling of the grip against your thumb pad and the smooth, surprise actuation of the mechanical sear. Any flinching or torque becomes immediately obvious.
If you want to test your gear against various shooting angles and footing challenges, visiting local clubs in major archery hubs like Pennsylvania or Wisconsin provides real-world evaluation. Shooting outdoors across uneven terrain quickly reveals whether your release strap is adjusted to the correct anatomical length and whether your riser wrap keeps your bow hand secure when fatigue sets in toward the end of a long round.
Common Mistakes and Practical Troubleshooting
One of the most widespread errors in archery is setting a mechanical release trigger far too light, often referred to as a hair trigger. While beginners often assume a featherlight trigger prevents movement, it actually breeds anxiety because the archer fears touching the peg before aiming is complete. Adjusting your trigger tension heavier allows you to rest your finger firmly over the peg, anchoring your hand completely before initiating back tension.
Another frequent pitfall involves wrapping a bow handle too thickly with cushioned tape in an attempt to make the bow feel softer in the hand. While thick cushioning feels comfortable when casually holding the bow, spongy material collapses unpredictably under sixty to seventy pounds of draw force. This variable compression creates inconsistent riser lean, which manifests as mysterious horizontal poi shifts that cannot be corrected by sight pin adjustments.
Lastly, inspect your mechanical release regularly for mechanical wear, debris accumulation, and frayed strap stitching. Dust, pocket lint, and field grit can migrate into internal sear assemblies, causing unexpected misfires or inconsistent trigger resistance. Applying a tiny drop of synthetic dry lubricant to the internal pivot points keeps the sear breaking crisply, while washing sweat out of your grip wrap prevents premature breakdown of the elastomer traction layer.
Published 2026-09-21 · reviewed with each rebuild, last October 2026.
Find archery ranges & sports shops near you
The directory lists 38,975 archery ranges & sports shops by state and city — pick your state or use the “Near me” button in the header.
More guides
-
 Money
MoneyA Guide to Archery Range Fees and Lesson Costs
-
 Buying
Choosing Broadheads and Aiming for the Perfect Shot
-
 Service
DIY Bow Maintenance, Tuning, and Basic Repairs
-
 Buying
Choosing Sights and Rangefinders for Better Accuracy
-
 Buying
Essential Gear for Target Practice and Bowhunting Preparation
-
 Money
MoneyUnderstanding Bow Purchase and Restringing Costs: A Complete Pricing Guide
-
 Owning
Arrow Selection, Cutting, and Fletching at Home: A Complete Guide
-
 Safety
Bowhunting Shot Placement Guide for Deer and Turkey
-
 Buying
Complete Guide to Choosing the Best Crossbow Broadheads
-
 Money
MoneyHow Much Does Archery Cost? A Realistic Beginner Budget
-
 Buying
Choosing the Right Arrows and Field Points: Shaft Materials, Weights, and Tuning
-
 Buying
Best Archery Sets for Beginners: Complete Buyer Guide and Starter Tips
-
 Owning
Best Archery Targets and Backstops: 3D, Foam, Bag, and DIY Setup Guide
-
 Buying
Beginner Archery Buying Guide: Recurve, Compound, and Traditional Bows
-
 Buying
Bowfishing Equipment Guide: Bows, Reels, Arrows, and Rigging Setups
-
 Owning
Lighted Nocks and DIY Arrow Building: Fletching, Cutting, and Tuning
-
 Buying
Crossbow Bolts, Broadheads, and Cocking Devices: Complete Buyer's Guide
-
 Buying
Complete Arrow Selection Guide: Carbon Shafts, Spine, Length, and Brands
-
 Safety
Archery Protective Gear: Arm Guards, Chest Protectors, Tabs, and Slings
-
 Buying
Archery Quivers Buying Guide: Hip, Back, and Bow-Mounted Options
-
 Buying
Bow Release Aids Explained: Wrist Strap, Thumb Button, and Hinge Releases
-
 Owning
Compound Bow Tuning and Care: Strings, Wax, Stabilizers, and Cases
-
 Buying
Arrow Rests Compared: Whisker Biscuit, Cable-Driven, and Limb-Driven
-
 Safety
Archery Lessons, Proper Form, Range Etiquette, and Youth Programs
-
 Owning
Complete Guide to Single Pin Bow Sights and Sight Tapes
-
 Owning
Arrow Selection and DIY Arrow Building: Shafts, Fletching, and Tools
-
 Owning
Finding Archery Ranges, Pro Shops, Clubs, and Instructor Programs
-
 Buying
Best Hunting Broadheads: Fixed Blade vs Mechanical Broadheads
-
 Buying
Archery Targets Guide: 3D Targets, Bags, Blocks, and DIY Backstops
-
 Buying
Archery Quivers Guide: Bow-Mounted, Hip, Back, and Crossbow Quivers
-
 Service
Bow Tuning and Setup: Paper Tuning, Arrow Rests, and Bow Maintenance
-
 Buying
Bowfishing Gear Guide: Bows, Rigs, Arrows, and Setup Options
-
 Owning
Essential Archery Accessories: Lighted Nocks, Arrow Pullers, and Arm Guards
-
 Buying
Archery Release Aids Guide: Thumb, Hinge, Wrist, and Mechanical Releases
-
 Buying
Essential Bowhunting Gear, Deer Supplies, and Gift Guide
-
 Buying
Crossbow Buying Guide: Matching Platforms, Bolts, Optics, and Fletching
-
 Buying
Beginner Bow & Arrow Starter Kits: How to Choose Your First Setup
-
 Owning
Traditional Archery, Longbows, and Primitive Gear
-
 Buying
Deer Hunting Bows: Comparing Recurve and Compound Setups, Finding Deals, and Studying Hunting Film
-
 Buying
Compound Bow Setup, Tuning, Form, and Equipment Guide
-
 Service
Crossbow Maintenance: String Replacement and Scope Sighting Guide
-
 Owning
Broken Bow Cabin Rentals: Complete Beavers Bend Vacation Guide
-
 Safety
Broken Bow Lake Rentals: Complete Guide to Boats, ATVs, and Trail Gear