Why Archers Transition to a Single Pin Platform
A single pin bow sight replaces the busy cluster of three, five, or seven horizontal pins with one distinct aiming point inside the scope housing. Many shooters discover that gazing through a peep sight at multiple fiber optic dots leads to target panic or picking the wrong yardage reference during high-pressure moments. Stripping away extra clutter allows your eye to center effortlessly on the target, delivering an open field of view that makes reading animal body language or spotting small scoring rings much simpler.
Precision is another primary reason archers switch away from fixed pins. Multi-pin sights force you to bridge gaps when a target stands between standard distances, such as forty-three yards, requiring you to float an imaginary space between two physical fibers. With an adjustable one pin sight, you simply turn an elevation dial or move a smooth vertical slider until the needle rests directly on your intended distance, enabling dead-on aiming at almost any range within your bow's ballistic trajectory.
While early designs had reputations for being slower to adjust in hunting situations, modern mechanisms feature rapid travel gears and yardage stops that minimize movement. Bowhunters and competitive target archers alike find that modern single pin bowsights provide a clean sight picture that naturally encourages better form, steadier hold, and more consistent follow-through on every shot.
Understanding Slider and Wheel Dial Mechanics
Adjustable hunting sights fall primarily into two mechanical categories: rear-facing or side-mounted rotary dials, and vertical track sliders. A dial system, popularized across decades of tournament and hunting gear, uses a circular wheel linked to a rack-and-pinion drive that smoothly raises and lowers the scope body. Archers who prefer dial units appreciate the natural thumb-and-finger turning motion, which makes micro-adjustments quick to achieve without taking your eyes completely off the target.
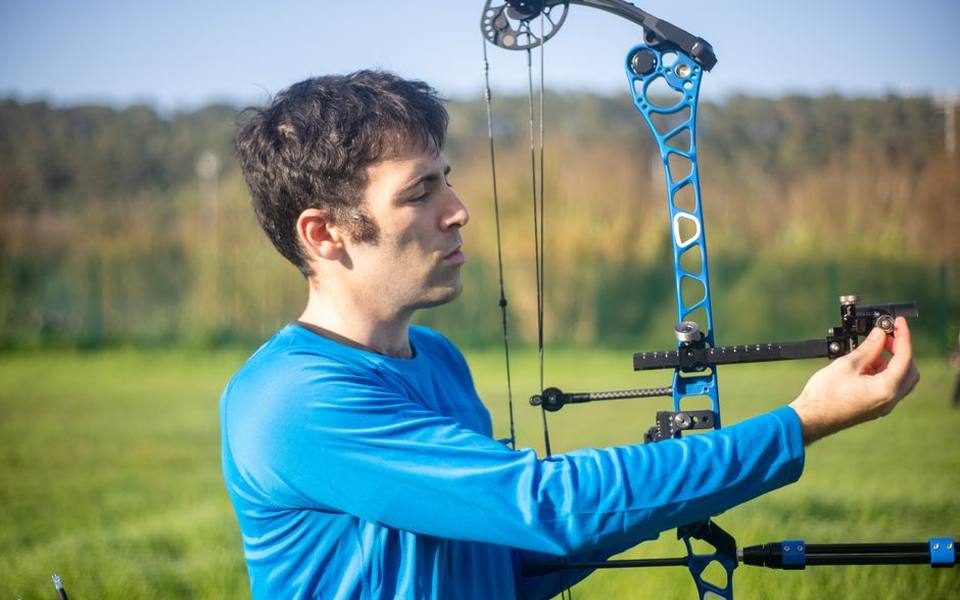
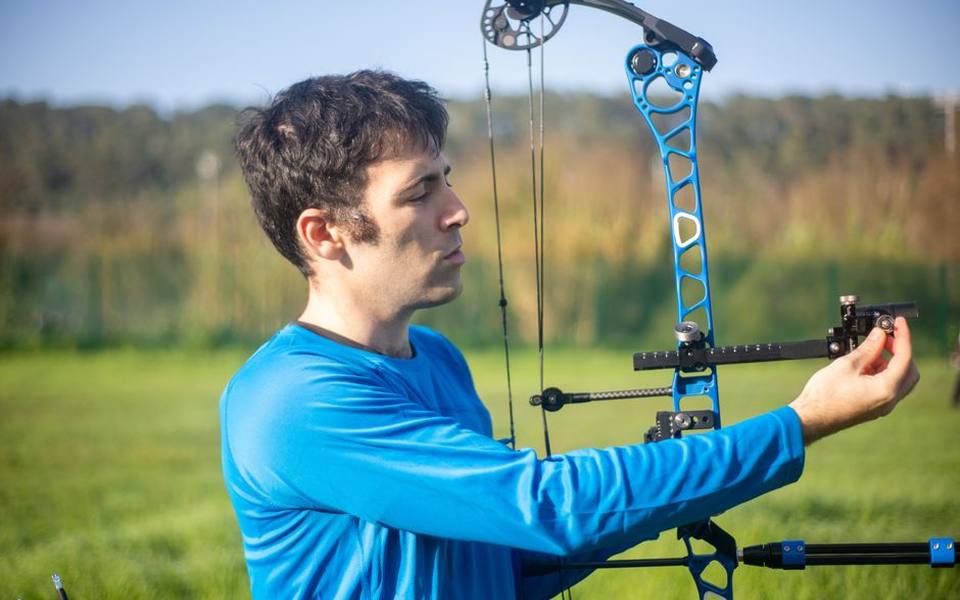
Vertical sliders utilize a curved or straight elevation bar that rides along a machined track. Systems built in this CBE single pin sight style often incorporate a locking lever alongside rapid-travel push rods, allowing you to loosen a thumb screw and slide the entire housing twenty yards in half a second. Once locked, fine-tuning knobs give you click adjustments for millimeter-precise alignment, which prevents vibration from shifting your housing loose after repeated heavy releases.
The fiber optic layout inside the scope also varies across platforms. Some single pin bow site designs position an upright vertical pin rising from the bottom of the bezel, while others bring a horizontal blade in from the side. Upright pins naturally cover less of the animal or 3D target downrange, leading many archers to favor vertical configurations because the post disappears beneath the center dot rather than slicing across the target face.
The Physics Behind Archery Sight Tapes
An archery sight tape is a narrow, calibrated strip of paper, waterproof film, or vinyl that adheres directly to the sight bracket where an indicator needle points to your yardage. Because arrows decelerate downrange and follow a parabolic curve governed by gravity, the distance gaps on a sight tape grow progressively wider as the target moves farther away. The physical distance between twenty and thirty yards on the scale is noticeably tighter than the gap between fifty and sixty yards.
The precise spacing between these marks is uniquely determined by arrow velocity, total arrow weight, draw length, and the physical distance between your eye, your peep, and the front sight scope. If you shoot a lightweight arrow at higher speeds, your trajectory remains flatter, requiring a tightly spaced archery site tape. Heavier hunting arrows drop steeper at extended distances, necessitating a wider spread across the printed scale lines.
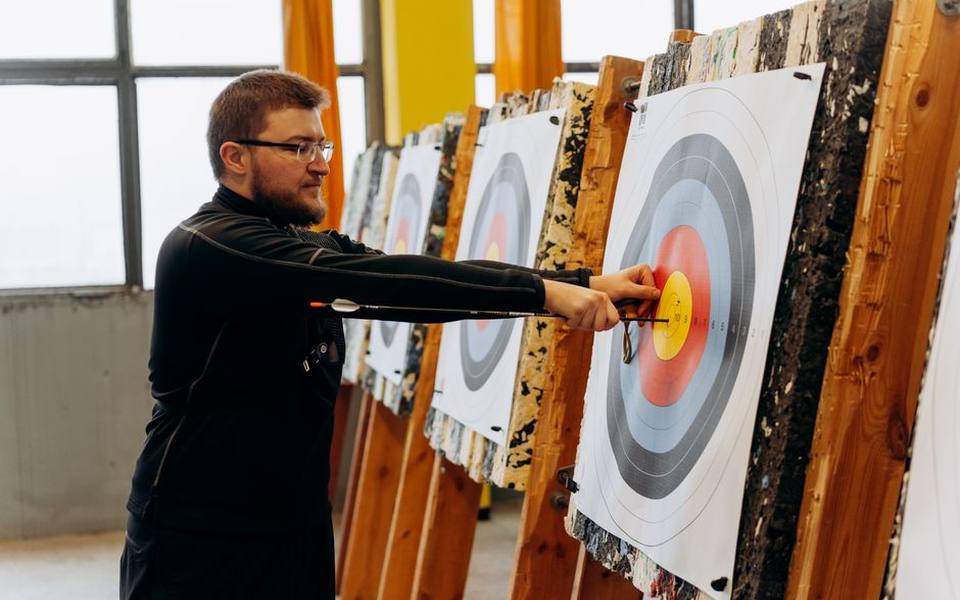
Before you can apply a finished yardage scale, you must calibrate your setup using temporary markings. Visiting an indoor archery range offers a wind-free environment to establish your baseline marks cleanly, ensuring that erratic drafts do not distort arrow grouping while you document your foundational numbers.
Establishing Your Baseline at Twenty Yards
Calibrating any single pin mechanism begins by attaching a blank setup tape or numbered reference scale to your adjustment rail. Most manufacturers supply a white calibration strip covered in uniform, equidistant tick marks numbered from one to one hundred. Position your elevation slider toward the upper third of its travel track to ensure your housing retains sufficient downward clearance to reach long-range distances without slapping your arrow fletchings on release.
Step up to twenty yards and begin shooting groups into a target face with a small, distinct center bullseye. Make all initial elevation and windage adjustments using your sight's gang micro-adjust knobs or physical bracket mounts, rather than moving the primary slider arm. You want your physical housing aligned so that the needle sits comfortably near the top of the scale when the arrow impacts dead-center at twenty yards.
Once three-arrow groups reliably hit dead center, draw a crisp mechanical pencil line across the blank setup tape directly under the needle tip, or record the exact number on your graduated setup scale. This mark becomes your immutable twenty-yard zero, forming the anchor point from which all ballistic calculations and downrange drops are measured.
Stepping Back to Calibrate Long-Range Drop
The second critical step requires shooting at an extended distance, typically sixty yards, though forty or fifty yards can be used if your personal skill level or local range distance is limited. The greater the gap between your short and long calibration marks, the more accurate your final sight tape will be. Stepping back exposes the true curvature of your arrow's flight arc, separating subtle trajectory differences that look nearly identical at short distances.
At the long range, loosen your elevation dial or slider lever and walk the sight housing downward as your arrows drop. Shoot careful, deliberate groups, nudging the slider lower until your arrows consistently strike the center of the bullseye. If you need help refining your long-distance release mechanics, scheduling time with a coach at ranges with archery lessons can help clean up form flaws that tend to magnify downrange dispersion.
When your long-distance group is dialed, mark the setup tape precisely at the needle or write down the exact reference number on your calibration track. The physical distance between your twenty-yard mark and your long-distance mark defines your bow's flight profile, unlocking the specific pre-printed tape engineered to match your speed.
Selecting and Applying Pre-Printed Yardage Scales
Major equipment makers package their sights with dozens of numbered, color-coded, or lettered waterproof scales. For example, a Black Gold sight tape system relies on a two-distance verification chart where the difference between your short and long reference numbers directly corresponds to a specific numbered tape in the booklet. Similarly, setting up an HHA single pin sight involves shooting twenty and sixty yards to calculate a simple subtraction value, pointing you to an exact factory scale matched to your draw setup.
When dealing with a CBE sight tape packet, you will find calibrated scales designed with fine yardage increments alongside clear half-yard indicators for tournament field courses. Carefully peel the designated tape from the backing sheet using a clean craft knife or tweezers to prevent skin oils from weakening the adhesive. Align the twenty-yard mark on the scale flawlessly with your initial reference line, keeping the tape straight along the channel edge.
Press the vinyl tape down firmly with a smooth cloth, smoothing out any trapped air bubbles from the center outward toward the borders. If you frequently shoot in damp weather or through brushy timber, applying a thin strip of clear outdoor tape over the printed scale protects the markings from abrasion, mud, and moisture.
Mathematical Gapping Systems and Auto-Align Technology
Not all single pin platforms require manual measurement charts or multi-page tape booklets. Certain sights, such as the Trophy Ridge single pin sight lineup featuring React technology, utilize interconnected internal gearing to set all distances mathematically. On an adjustable housing like the Trophy Ridge React One Pro, sighting in your top pin at twenty yards and your second test mark at thirty or forty yards physically drives the rest of the scale into correct mechanical alignment.
The integrated gearing calculates standard gravitational drop curves based on basic projectile physics. As you turn the master calibration screw to bridge the distance between your two baseline yardages, the internal ring spaces every other yardage indicator automatically from thirty all the way to one hundred yards. This system cuts sight-in time significantly and eliminates the guesswork of matching tiny lines on paper strips.
While mathematical systems offer exceptional convenience, they perform best when your arrow speed falls comfortably within standard compound bow velocity ranges. Extremely heavy traditional hunting arrows or ultra-light speed setups may occasionally sit near the edge of mechanical gear limits, making hand-verified custom tapes preferable for specialized arrow builds.
Dialing In for Target Archery and 3D Courses
Transitioning from flat practice ranges to realistic field terrain requires a deep understanding of your sight's adjustment travel. On an undulating 3D archery course, target angles, steep ravines, and unmarked distances reward shooters who can adjust their pointer smoothly with minimal hand movement. A single pin layout shines on foam targets because it provides an uninterrupted view of the 10-ring and 12-ring scoring zones without obscuring reference anatomy.
Competitive shooters frequently pair a CBE one pin sight or similar target-oriented slider with sight magnifiers or clarifier lenses in their peep. When working with magnified glass, keeping your single aiming dot centered in the scope becomes even more critical, as small torque errors at the grip will noticeably move the reticle off center. Ensure your bubble level is calibrated along all three axes before shooting on uneven ground.
Second-axis and third-axis leveling ensure your vertical slider track travels straight up and down, even when aiming up steep embankments or down into valleys. If your third axis is canted, your bow may shoot dead center on flat ground but drift progressively left or right on uphill or downhill angles, regardless of how accurate your yardage tape appears.
Hunting Strategies with an Adjustable Housing
The most common hesitation bowhunters express about moving to an HHA one pin sight or any adjustable mechanism is the fear of being caught at full draw when an animal moves closer or further away. Experienced woodsmen manage this variable by establishing a default cruising yardage. Setting your slider to twenty-seven or thirty yards while on stand covers nearly all chip shots between twenty and thirty-five yards through simple hold-over or hold-under aiming.
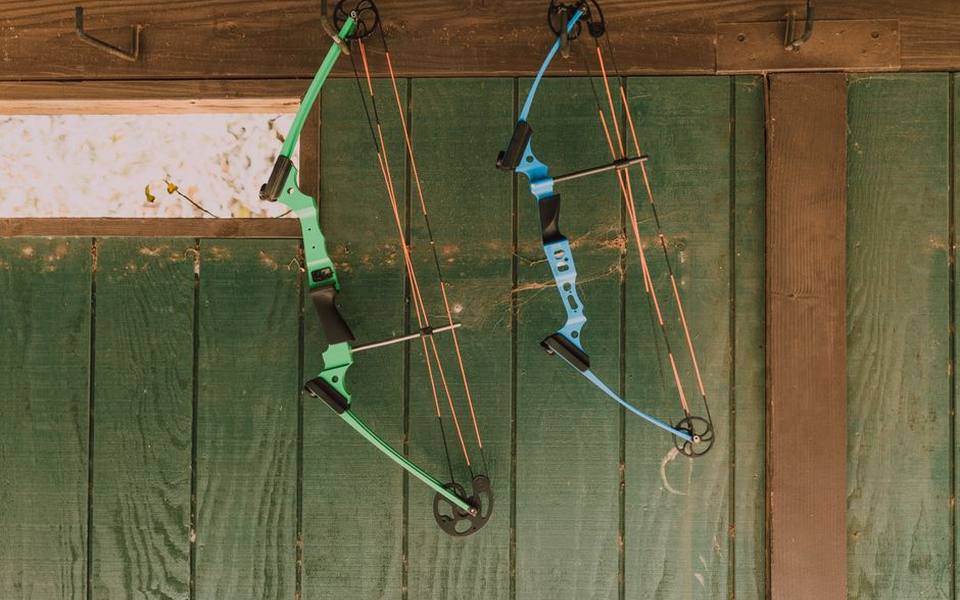
With a standard hunting arrow traveling at typical compound bow speeds, aiming at the bottom third of the heart on a twenty-yard shot yields a clean double-lung hit if your sight rests at thirty yards. Conversely, aiming high on the shoulder crease at thirty-five yards drops the broadhead cleanly into the vital pocket. Understanding your setup's trajectory envelope lets you take quick, close-range shots without touching the elevation dial.
When an elk or whitetail pauses comfortably in an open lane at forty-five or fifty yards, you usually have adequate time to range the animal with a laser, rotate your dial silently to the exact number, and draw with complete confidence. The clarity of a clean single dot reduces shot anxiety significantly when shooting broadheads at extended distances.
Troubleshooting Tape Drift and Bow Maintenance Shifts
Even a meticulously installed sight tape can begin striking high or low over time due to normal equipment settling. Brand new bow strings typically stretch during their initial break-in period, which slightly alters your peep height and cam timing. A minuscule shift in peep elevation translates to significant trajectory changes downrange, making it appear as though your sight scale suddenly fell out of calibration.
Whenever your marks drift, stop by an archery pro shop to inspect your bow on a draw board before peeling off your tape. Checking your axle-to-axle length, cam synchronization, and arrow rest alignment often reveals that a mechanical shift occurred on the bow rather than an error on your sight tape. Correcting string stretch generally restores your original downrange tape marks instantly.
Similarly, seasonal temperature shifts and equipment changes affect arrow dynamics. Shooting in dense, frigid winter air can cause arrows to drop slightly faster than in hot summer conditions. If you change your broadhead weight, swap fletchings, or increase arrow shaft spine stiffness, treat your setup as a clean slate and re-verify your twenty and sixty-yard marks before relying on your existing scale in the field.
Published 2026-09-21 · reviewed with each rebuild, last October 2026.
Find archery ranges & sports shops near you
The directory lists 38,975 archery ranges & sports shops by state and city — pick your state or use the “Near me” button in the header.
More guides
-
 Money
MoneyA Guide to Archery Range Fees and Lesson Costs
-
 Buying
Choosing Broadheads and Aiming for the Perfect Shot
-
 Service
DIY Bow Maintenance, Tuning, and Basic Repairs
-
 Buying
Choosing Sights and Rangefinders for Better Accuracy
-
 Buying
Essential Gear for Target Practice and Bowhunting Preparation
-
 Money
MoneyUnderstanding Bow Purchase and Restringing Costs: A Complete Pricing Guide
-
 Owning
Arrow Selection, Cutting, and Fletching at Home: A Complete Guide
-
 Safety
Bowhunting Shot Placement Guide for Deer and Turkey
-
 Buying
Complete Guide to Choosing the Best Crossbow Broadheads
-
 Money
MoneyHow Much Does Archery Cost? A Realistic Beginner Budget
-
 Buying
Choosing the Right Arrows and Field Points: Shaft Materials, Weights, and Tuning
-
 Buying
Best Archery Sets for Beginners: Complete Buyer Guide and Starter Tips
-
 Owning
Best Archery Targets and Backstops: 3D, Foam, Bag, and DIY Setup Guide
-
 Buying
Beginner Archery Buying Guide: Recurve, Compound, and Traditional Bows
-
 Buying
Bowfishing Equipment Guide: Bows, Reels, Arrows, and Rigging Setups
-
 Owning
Lighted Nocks and DIY Arrow Building: Fletching, Cutting, and Tuning
-
 Buying
Crossbow Bolts, Broadheads, and Cocking Devices: Complete Buyer's Guide
-
 Buying
Complete Arrow Selection Guide: Carbon Shafts, Spine, Length, and Brands
-
 Safety
Archery Protective Gear: Arm Guards, Chest Protectors, Tabs, and Slings
-
 Buying
Archery Quivers Buying Guide: Hip, Back, and Bow-Mounted Options
-
 Buying
Bow Release Aids Explained: Wrist Strap, Thumb Button, and Hinge Releases
-
 Owning
Compound Bow Tuning and Care: Strings, Wax, Stabilizers, and Cases
-
 Buying
Arrow Rests Compared: Whisker Biscuit, Cable-Driven, and Limb-Driven
-
 Safety
Archery Lessons, Proper Form, Range Etiquette, and Youth Programs
-
 Owning
Arrow Selection and DIY Arrow Building: Shafts, Fletching, and Tools
-
 Owning
Finding Archery Ranges, Pro Shops, Clubs, and Instructor Programs
-
 Buying
Best Hunting Broadheads: Fixed Blade vs Mechanical Broadheads
-
 Buying
Archery Targets Guide: 3D Targets, Bags, Blocks, and DIY Backstops
-
 Buying
Archery Quivers Guide: Bow-Mounted, Hip, Back, and Crossbow Quivers
-
 Service
Bow Tuning and Setup: Paper Tuning, Arrow Rests, and Bow Maintenance
-
 Buying
Bowfishing Gear Guide: Bows, Rigs, Arrows, and Setup Options
-
 Owning
Essential Archery Accessories: Lighted Nocks, Arrow Pullers, and Arm Guards
-
 Buying
Archery Release Aids Guide: Thumb, Hinge, Wrist, and Mechanical Releases
-
 Buying
Essential Bowhunting Gear, Deer Supplies, and Gift Guide
-
 Buying
Crossbow Buying Guide: Matching Platforms, Bolts, Optics, and Fletching
-
 Buying
Beginner Bow & Arrow Starter Kits: How to Choose Your First Setup
-
 Owning
Traditional Archery, Longbows, and Primitive Gear
-
 Buying
Deer Hunting Bows: Comparing Recurve and Compound Setups, Finding Deals, and Studying Hunting Film
-
 Buying
Compound Bow Setup, Tuning, Form, and Equipment Guide
-
 Owning
Compound Bow Release Aids and Grip Tape: Enhancing Control and Consistency
-
 Service
Crossbow Maintenance: String Replacement and Scope Sighting Guide
-
 Owning
Broken Bow Cabin Rentals: Complete Beavers Bend Vacation Guide
-
 Safety
Broken Bow Lake Rentals: Complete Guide to Boats, ATVs, and Trail Gear